There are projects you start with full energy, but after some time you lose interest in them. And there are projects you start and, they won't let you in peace until they are finished. The e-ink art display is definitely the last one.
All started with the video made by Greg Raiz. I watched the clip a lot until I realized i love e-ink and i need something similar. Let's go!
The first issue with e-ink technology. E-ink displays are not cheap, they are super expensive. There maybe 5 manufacturers building screens larger than 25 inches. The second problem is software. Each vendor has its own tech and even subscription models you need to tackle. At the end of the line, nothing in this space comes out of the box, at least not for a project like this.
Visionect is probably one of the largest manufacturer, which was also mentioned in Greg's video. FrameLabs offers great products with high quality and ready to use. For both vendors, the price is above $2000 (for the large models) but you will get great quality for sure. Visionect also charges a yearly fee just to use the monitor. That means you pay $2300 and at least $60 for the software license 🤡. FrameLabs display is free to use after purchase. Both offer software with which you can display images, photos and more. If you go with one of them, it will be an easy ride to get to your e-ink art display!
I almost purchased one of the 31-inch displays, but I got lucky and found a second-hand Dasung Paperlike 253 (b/w) Monitor. They retail for around $1650 but I got the offer for $500. 🎉
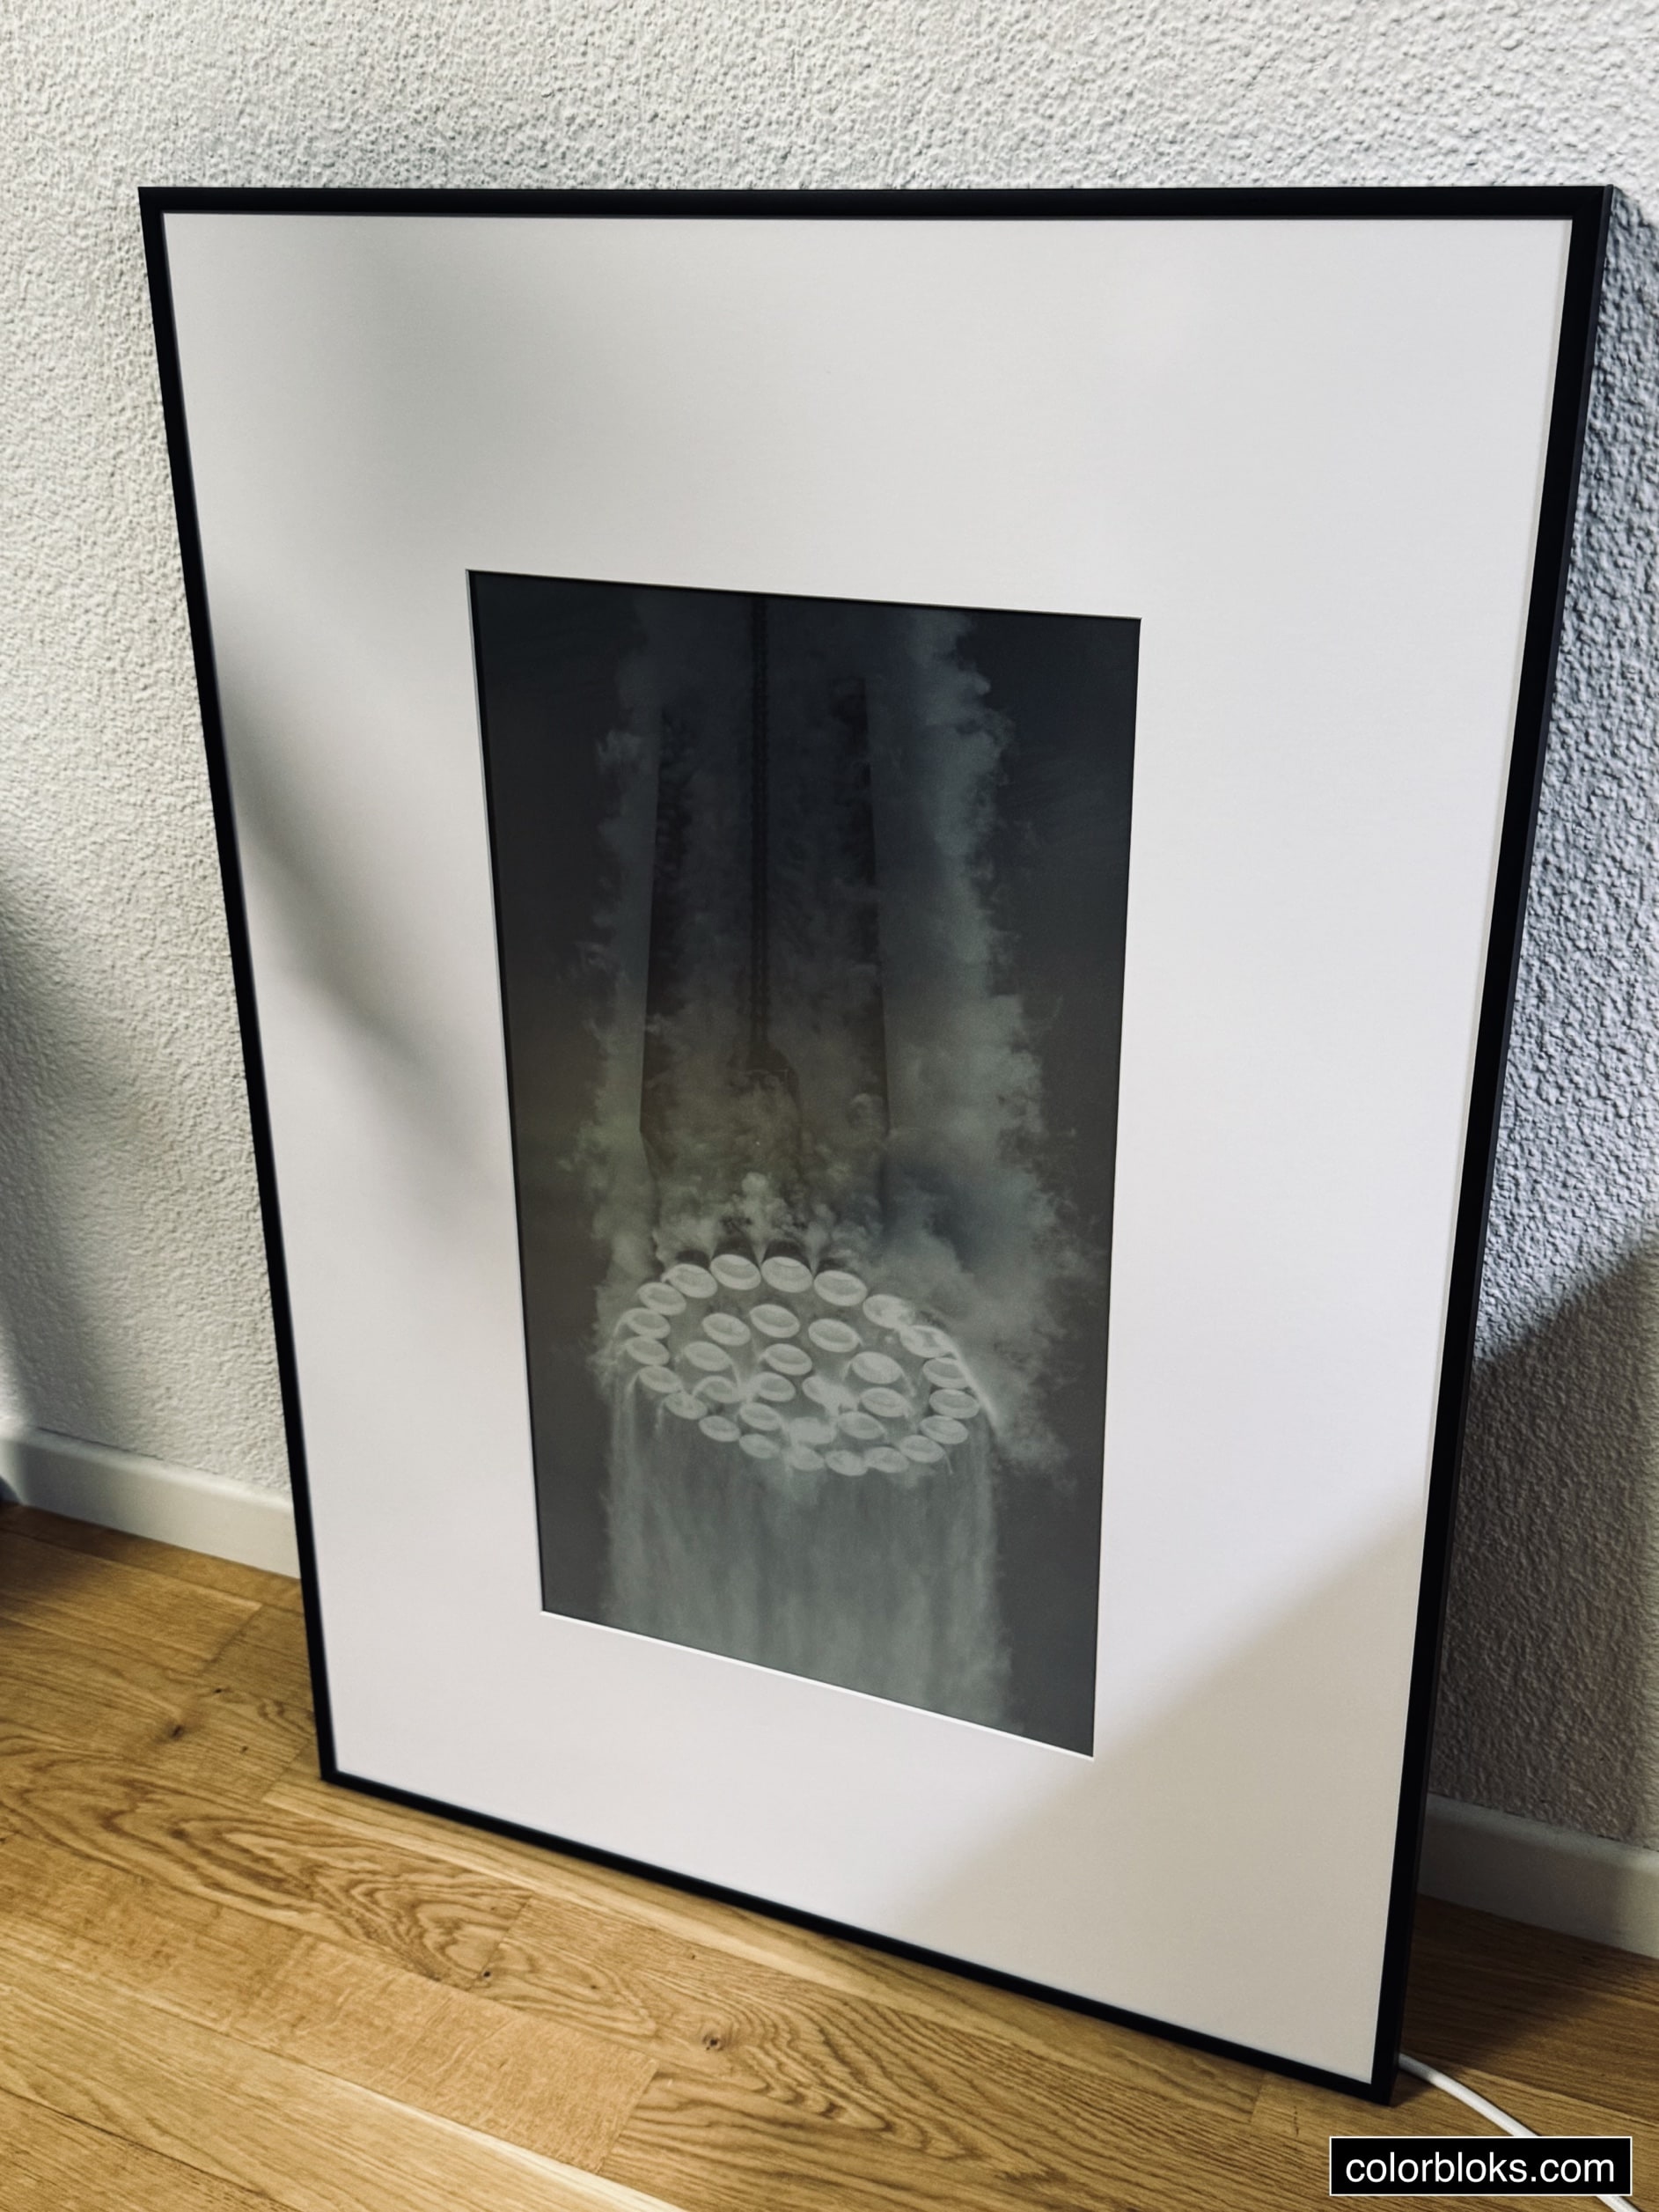
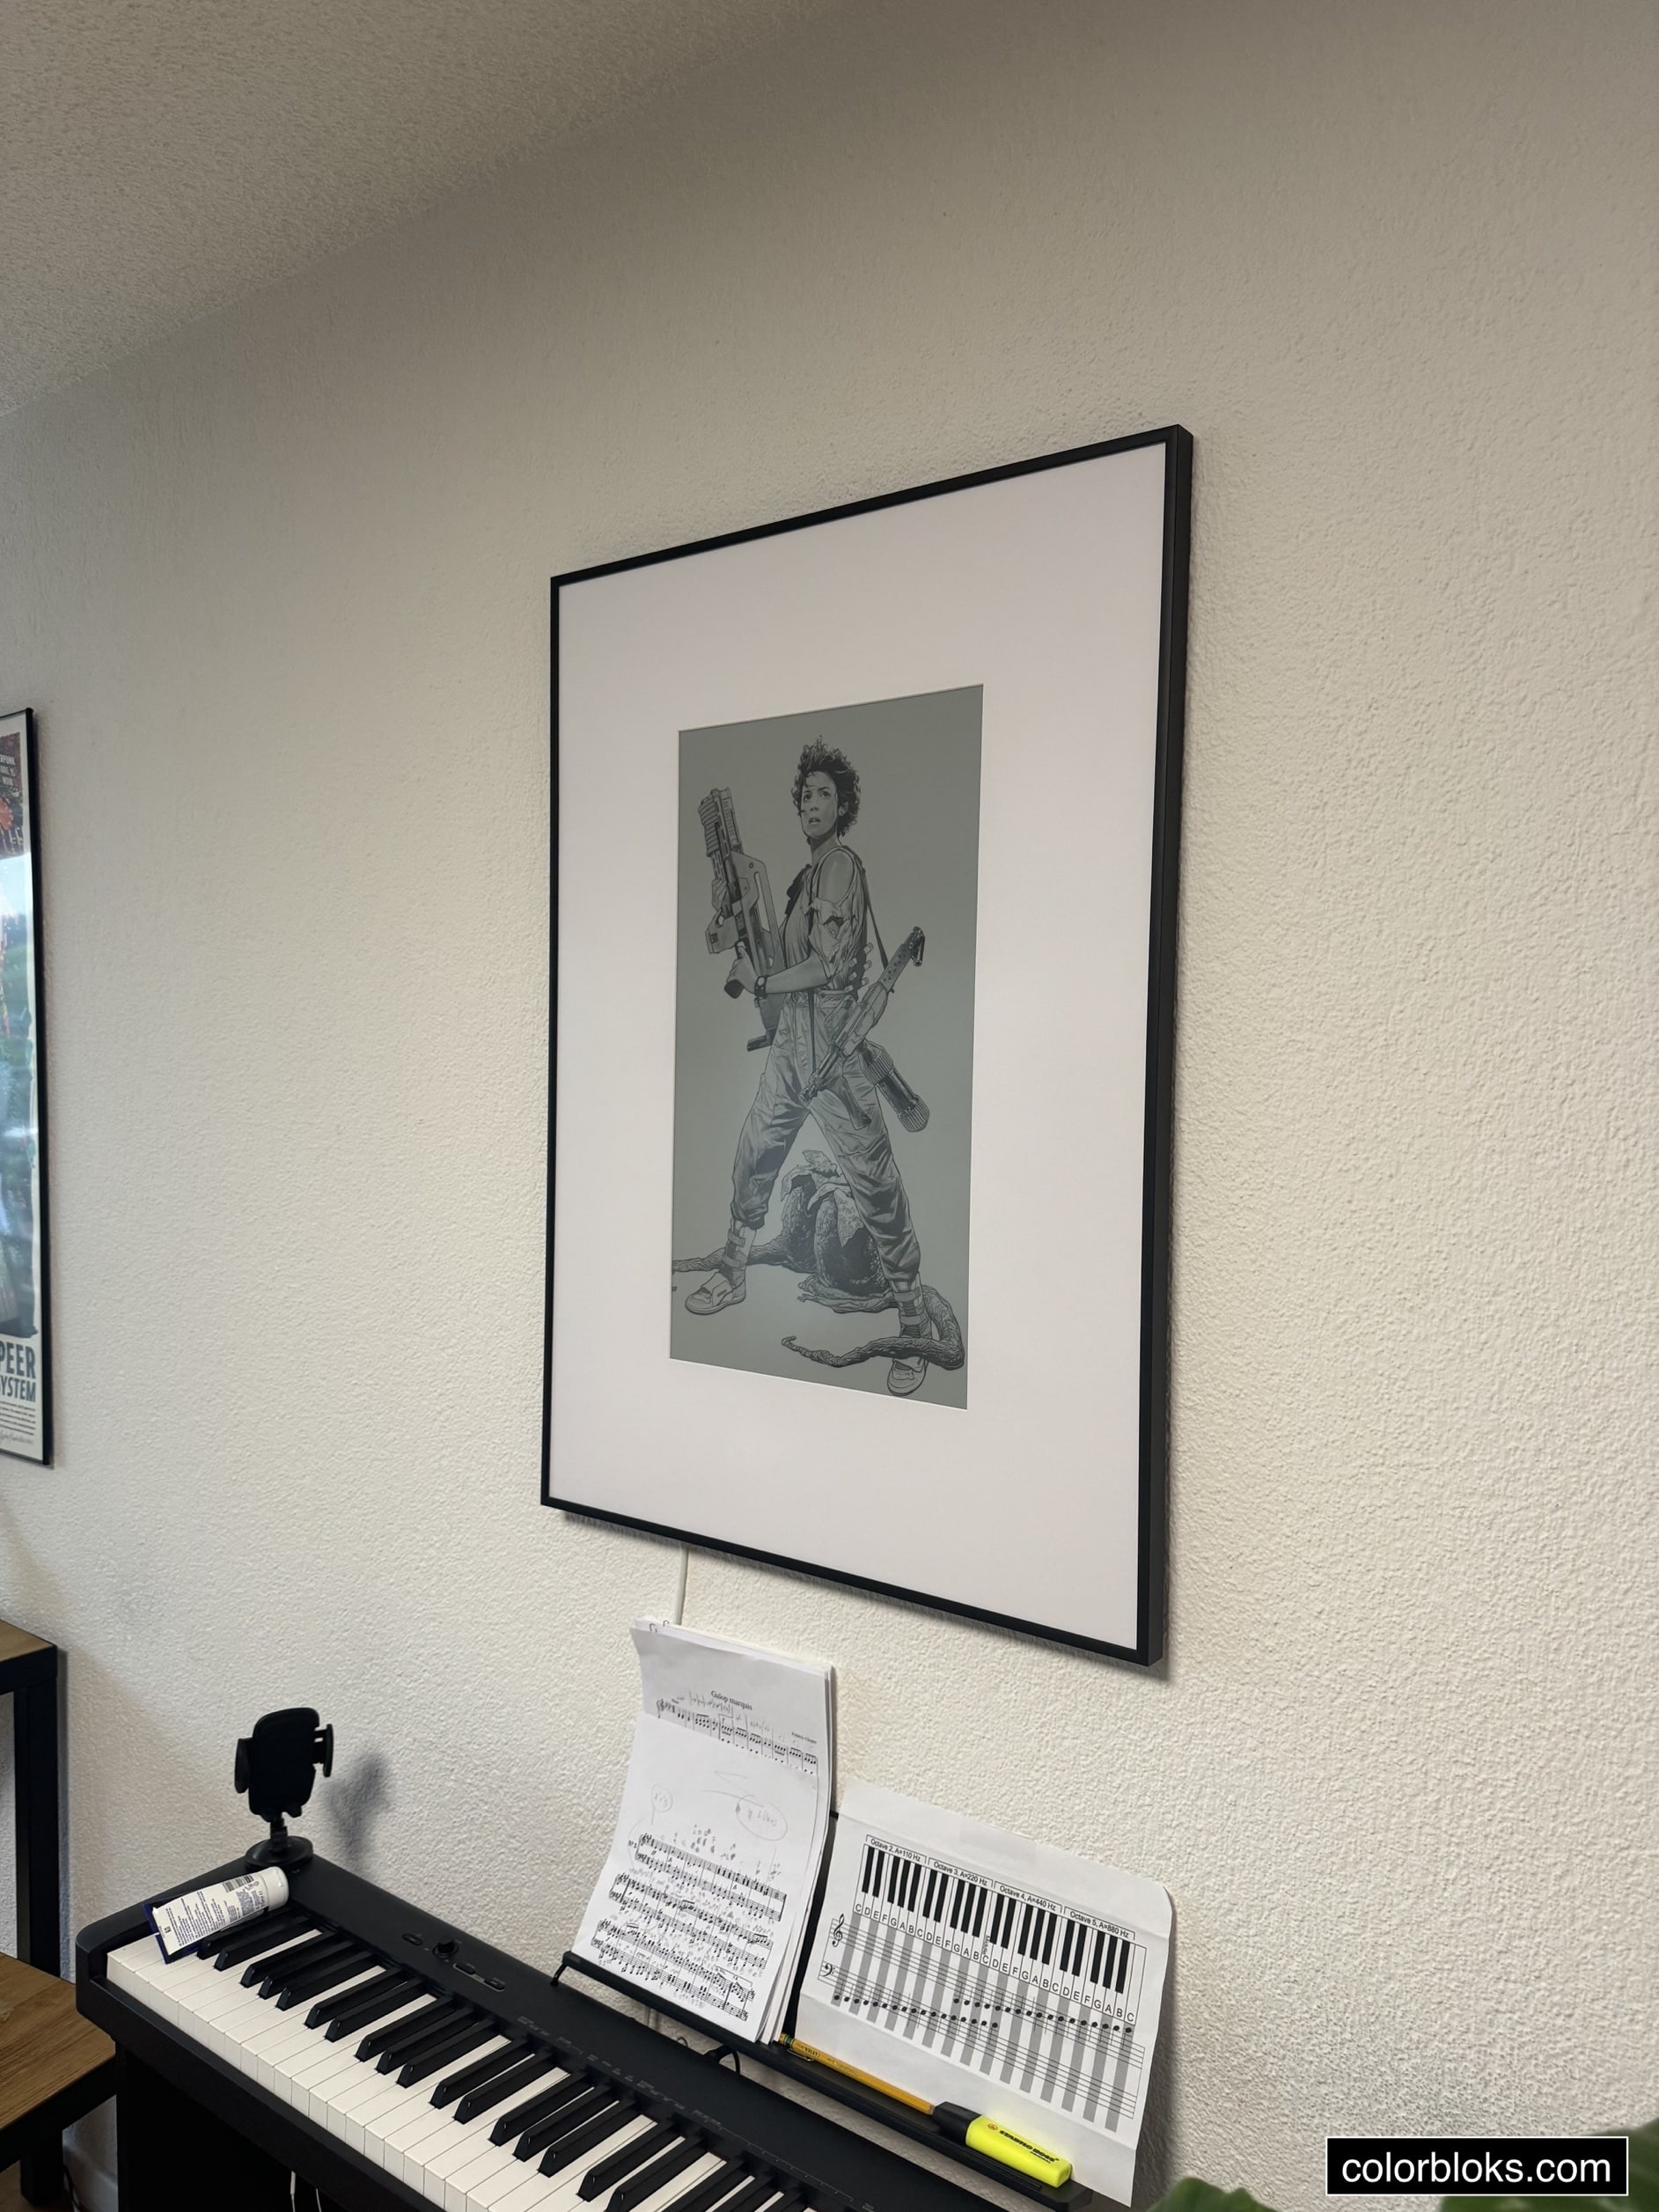
The art frame should look like a professional art piece, that's the reason I decided to use a passepartout and the frame in black. The frame software should be able to load images from my server, and it should be possible to load any website. Since the ordered display took two weeks to deliver, i started with the software.
I run an M1 mac as a home automation server, and that's exactly the place I run the server part of the frame. I wrote a small python server that loads images and serves them to http://server.local/app/index.html, that's it. In short, it doesn't matter what server you use or what you load into that website. The website you publish just needs to be accessible on the local network. You can also go fancy and show a WordPress website, it's up to you.
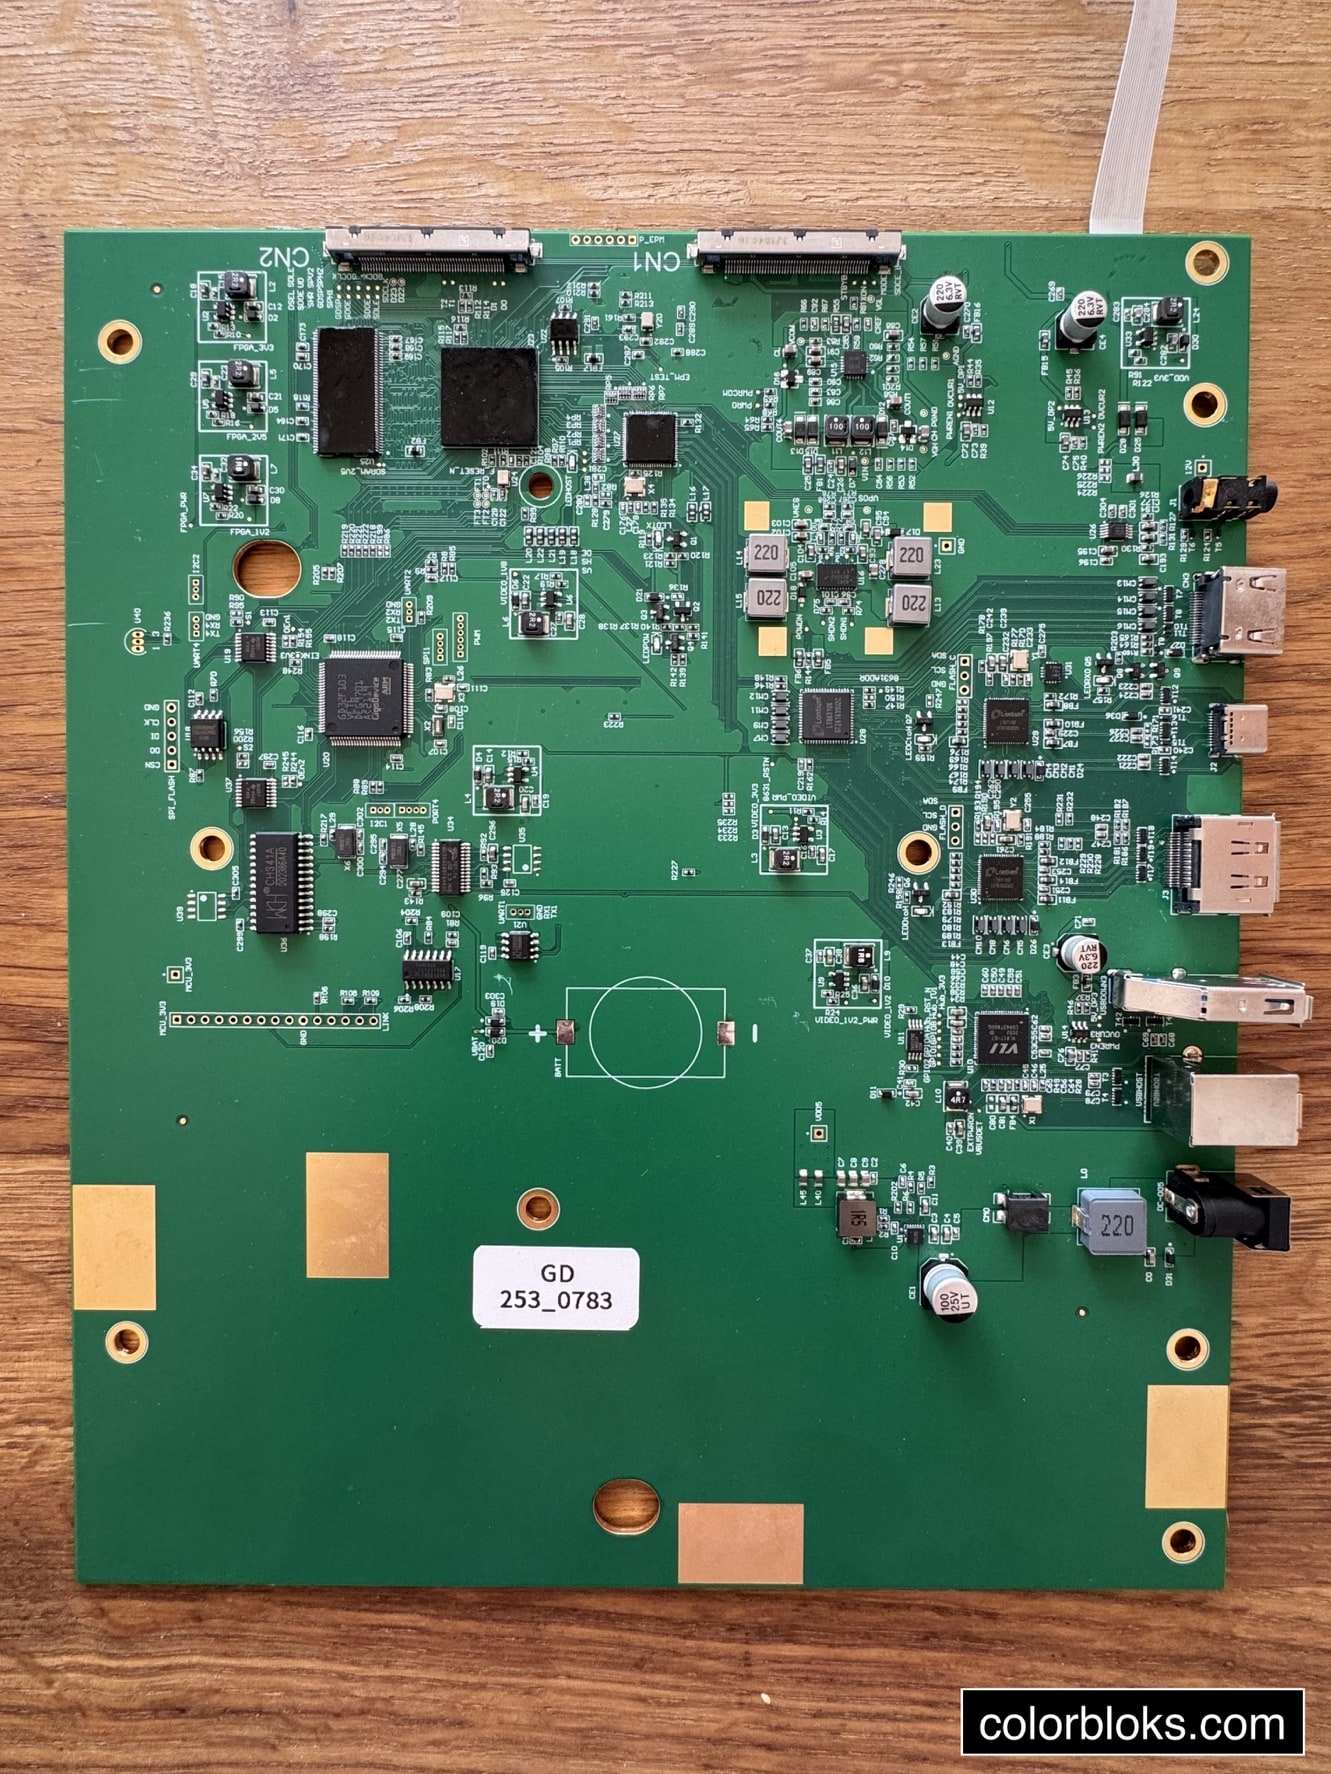
I can just tell about the Dasung Monitor, which works like any other monitor. The Dasung 253 has one HDMI output and it can render images up to 3200x1800 with 145dpi. To render the image I use a Raspberry Pi 4, in kiosk mode. You need at least a Pi 4, I tried with a Pi Zero but got not a full image out of it. The images should be 3200x1800. I did some test and it looks like Dasung converts images to 16 grayscale images. I personally convert the images by myself to grayscale and adjust the contrast to get the best quality.
There are a lot of tutorials online about Raspberry PI kiosk mode. The cool part is, the Pi loads directly into the kiosk mode, there is no OS installed, just the browser. You can configure a default kiosk-URL, and you guess right: here you load the URL http://server.local/app/index.html. Every time you restart the PI, it will boot to this page.
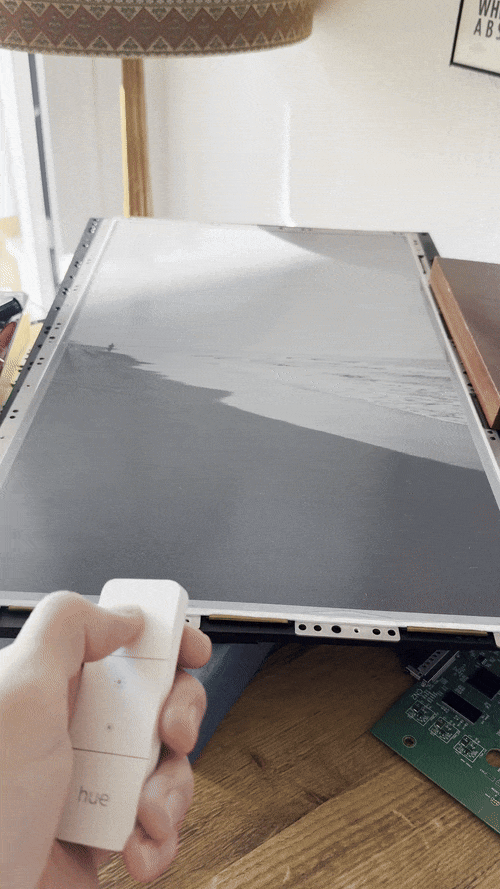
I use browsersync on my server and frame to load the website which loads a random image. You can now use server.local:8001/__browser_sync__?method=reload from any device in your network to force reload all browsers with that port and browsersync connected. If you run homebridge, you can use a SSH plugin to do a CURL command to refresh the frame via homekit.🤷♀️ The screen flashes black and white 3 times to get rid of any e-ink ghosting before loading the new image. This is done with javaScript.
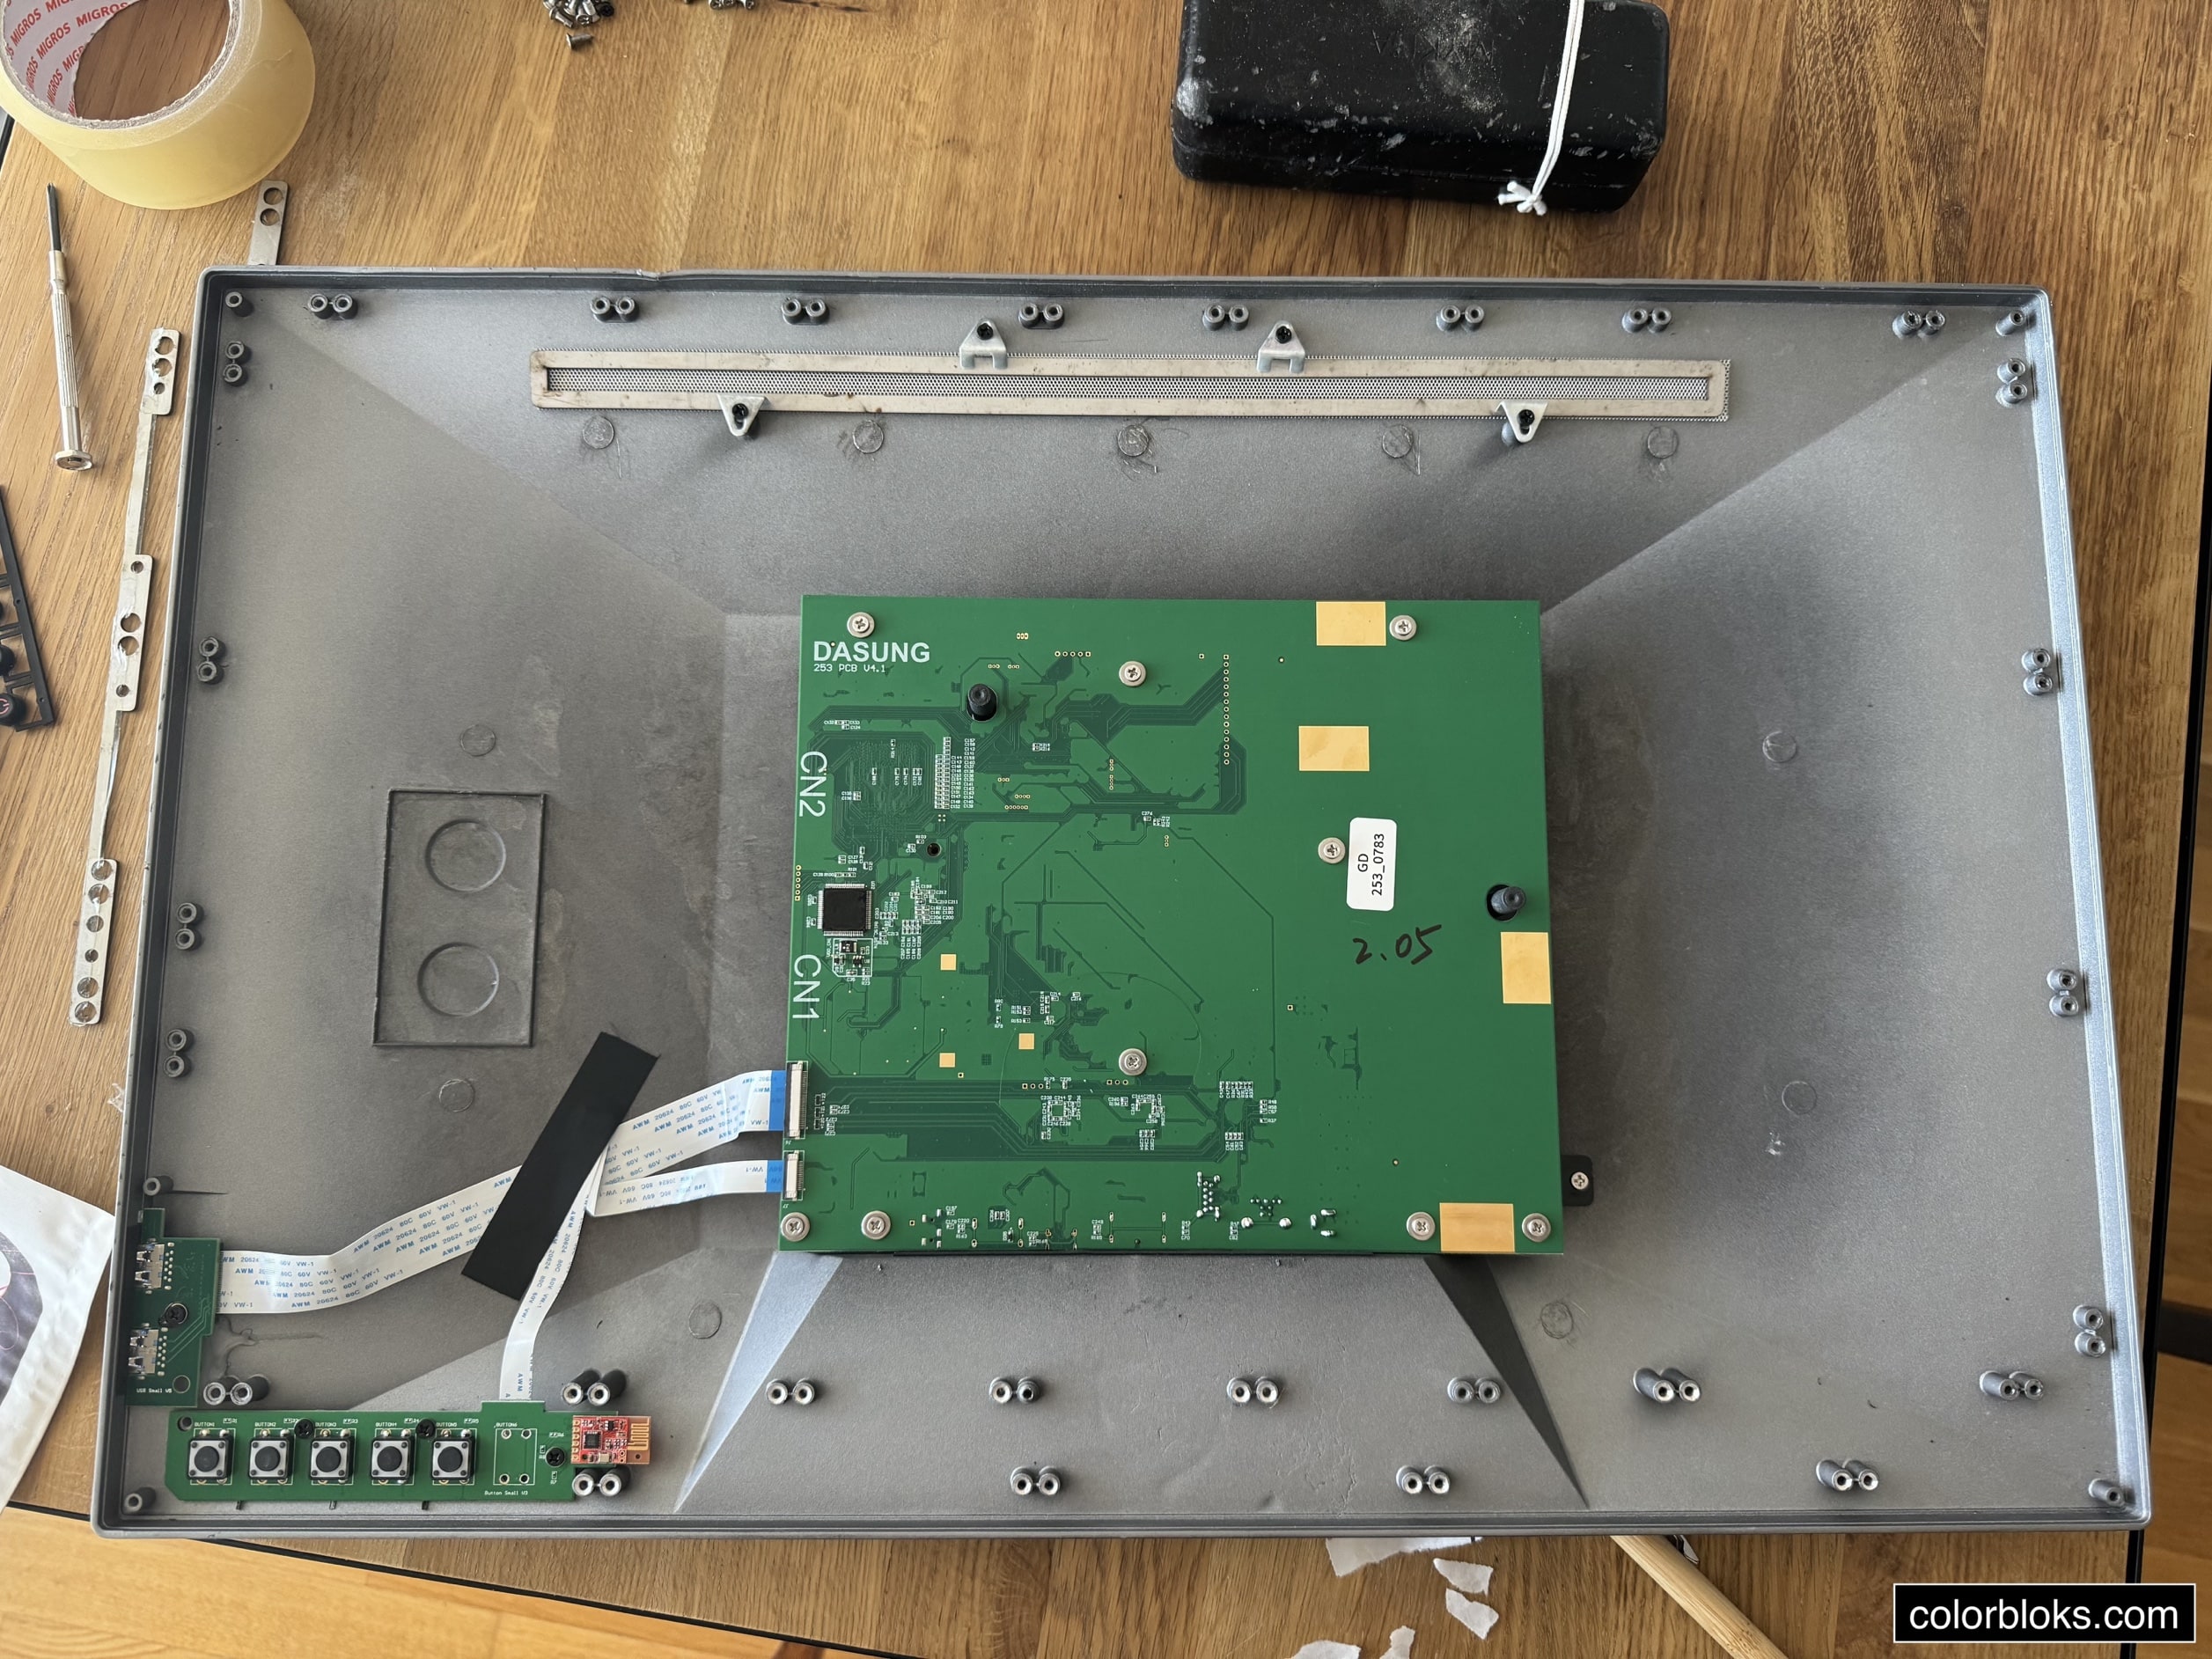
I'm not sure why, but the Dasung monitor has over 80 screws to hold the display. Inside there is nothing special, just some PCB and USB ports, that's it. Cool though is that all parts connected with standard cables and connectors, no need to solder something or change cables. The e-ink display itself is mounted on top of a metal plate.
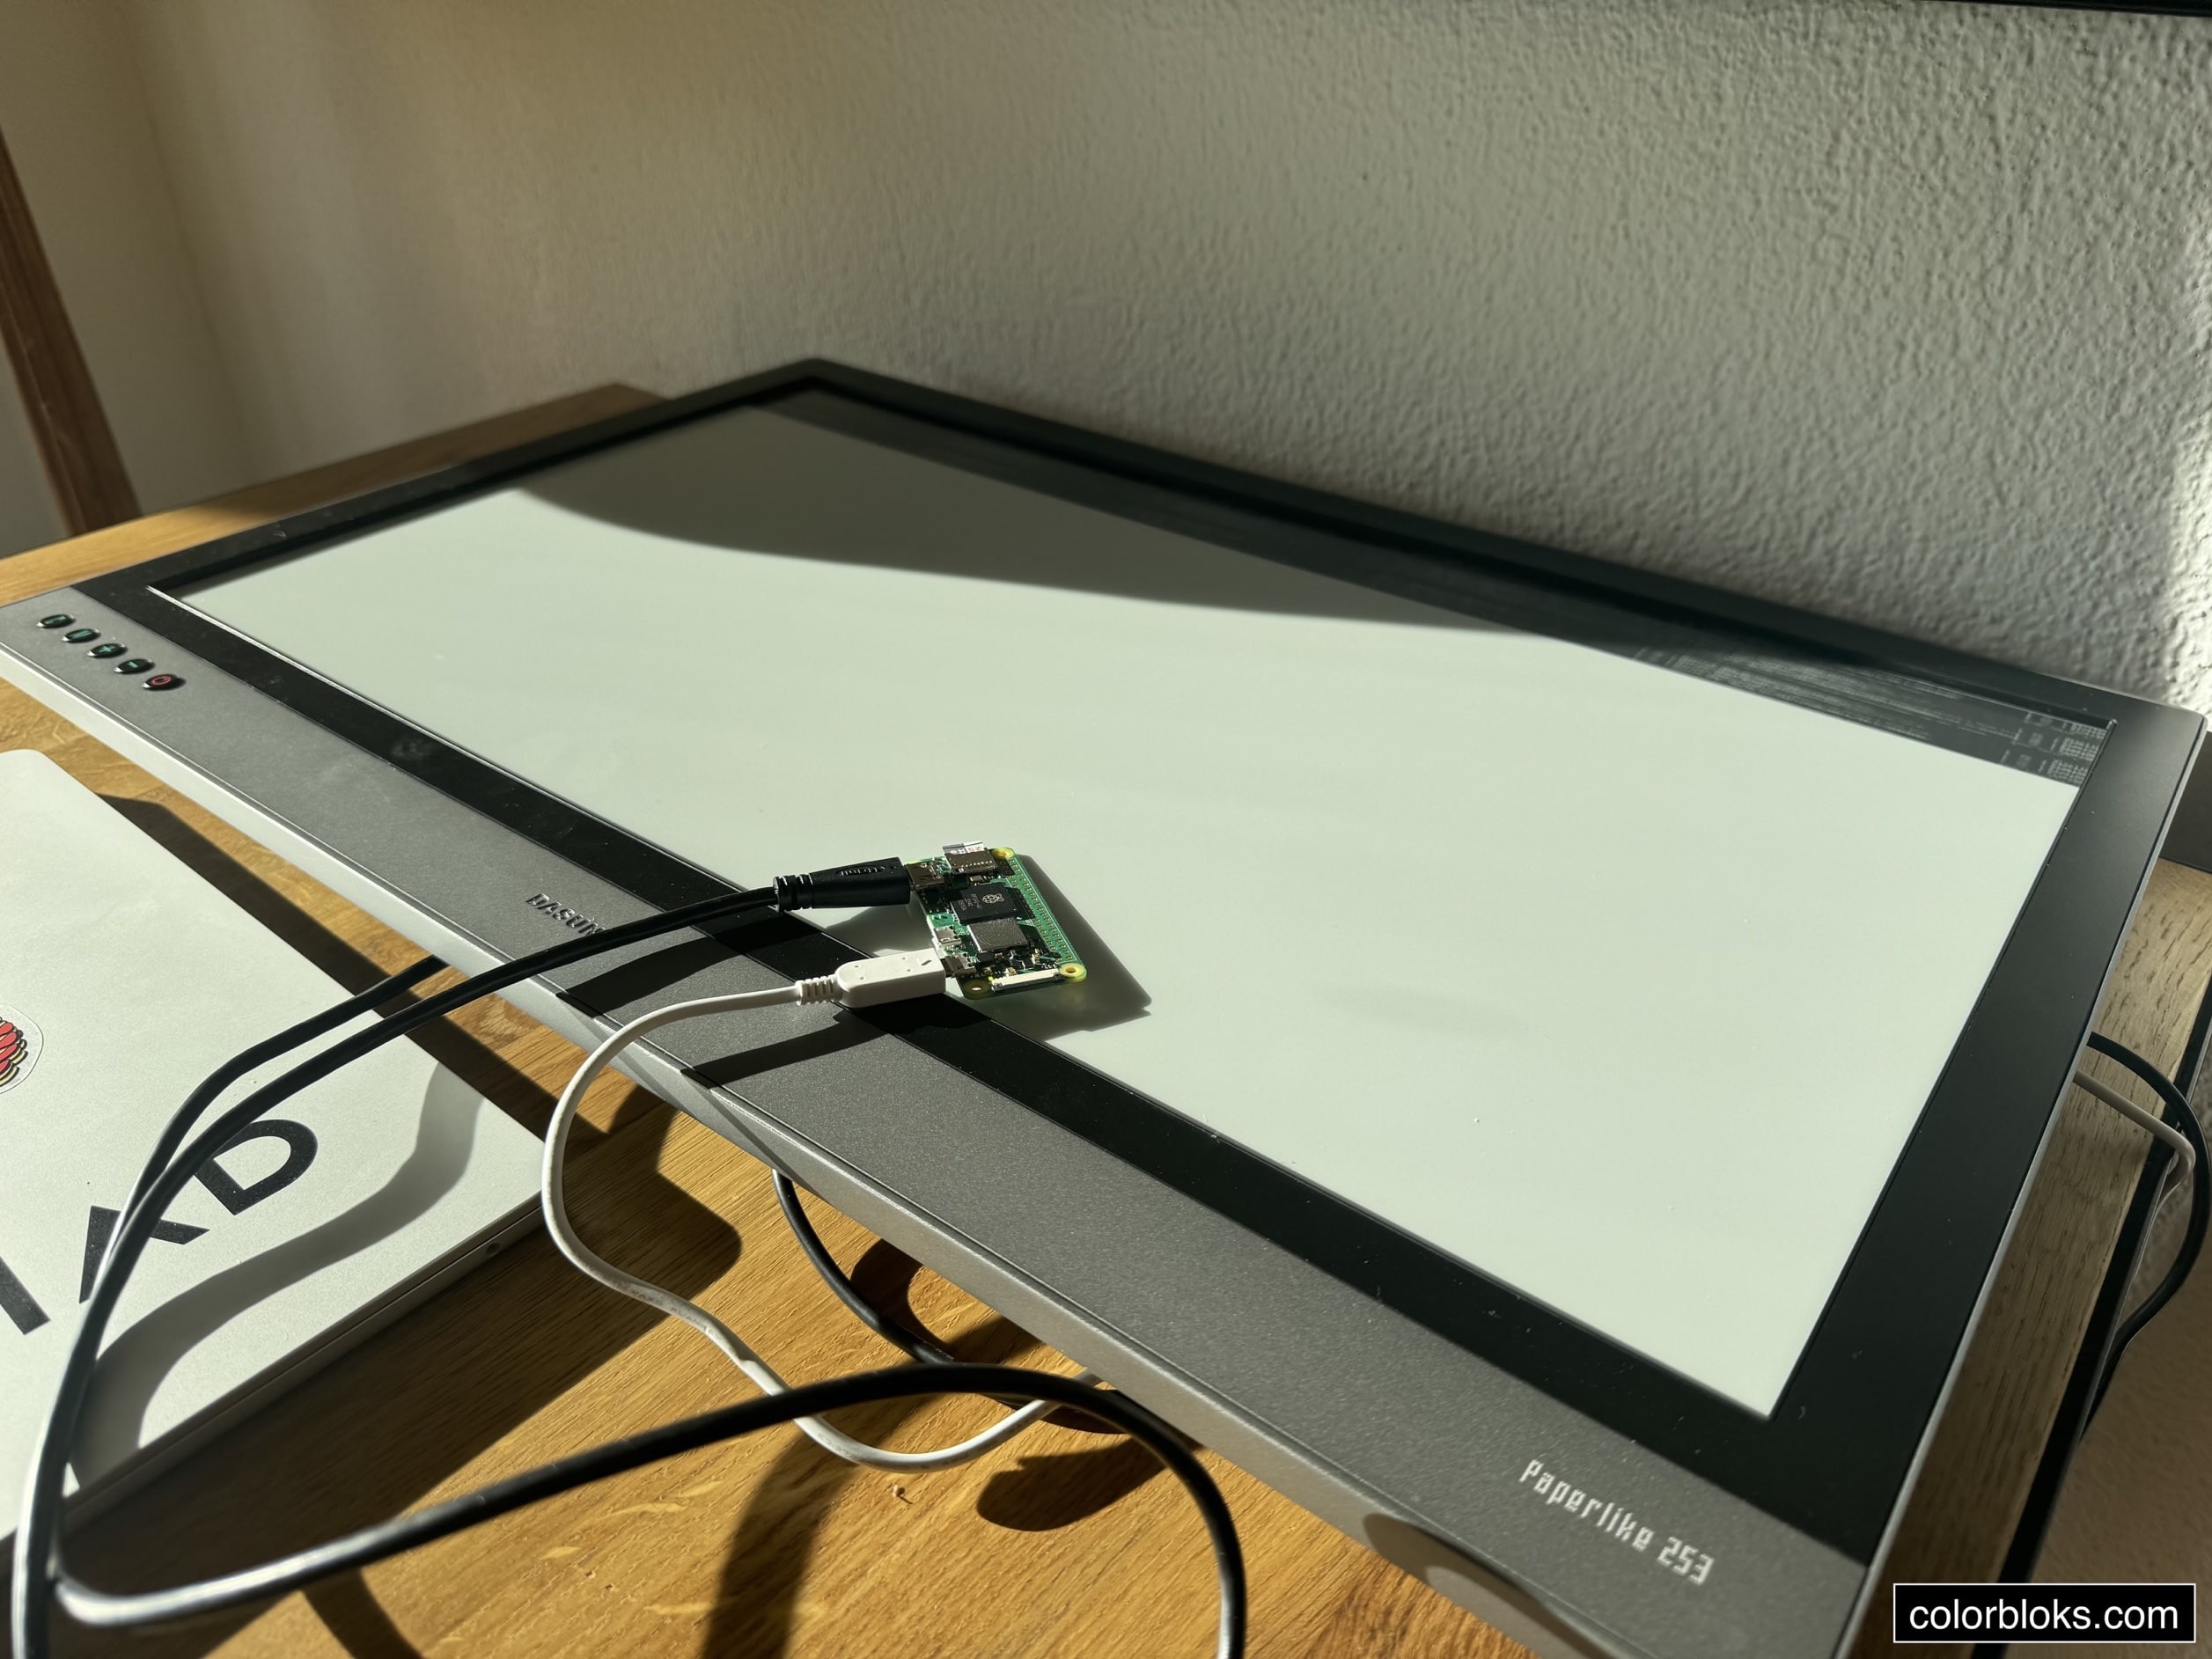

On the Dasung board, I found a 3V and ground Pin. The perfect place to hook up the Raspberry Pi, no need for an external power supply. Also cool. If you turn the monitor off, the picture stays forever. If you power the display on, the PI boots and loads a new image from the server. If you don't want a new picture every day, you load one image and turn the display off. I added a power switch for that. The Pi and display do not use a lot of power so I just leave it on all the time.


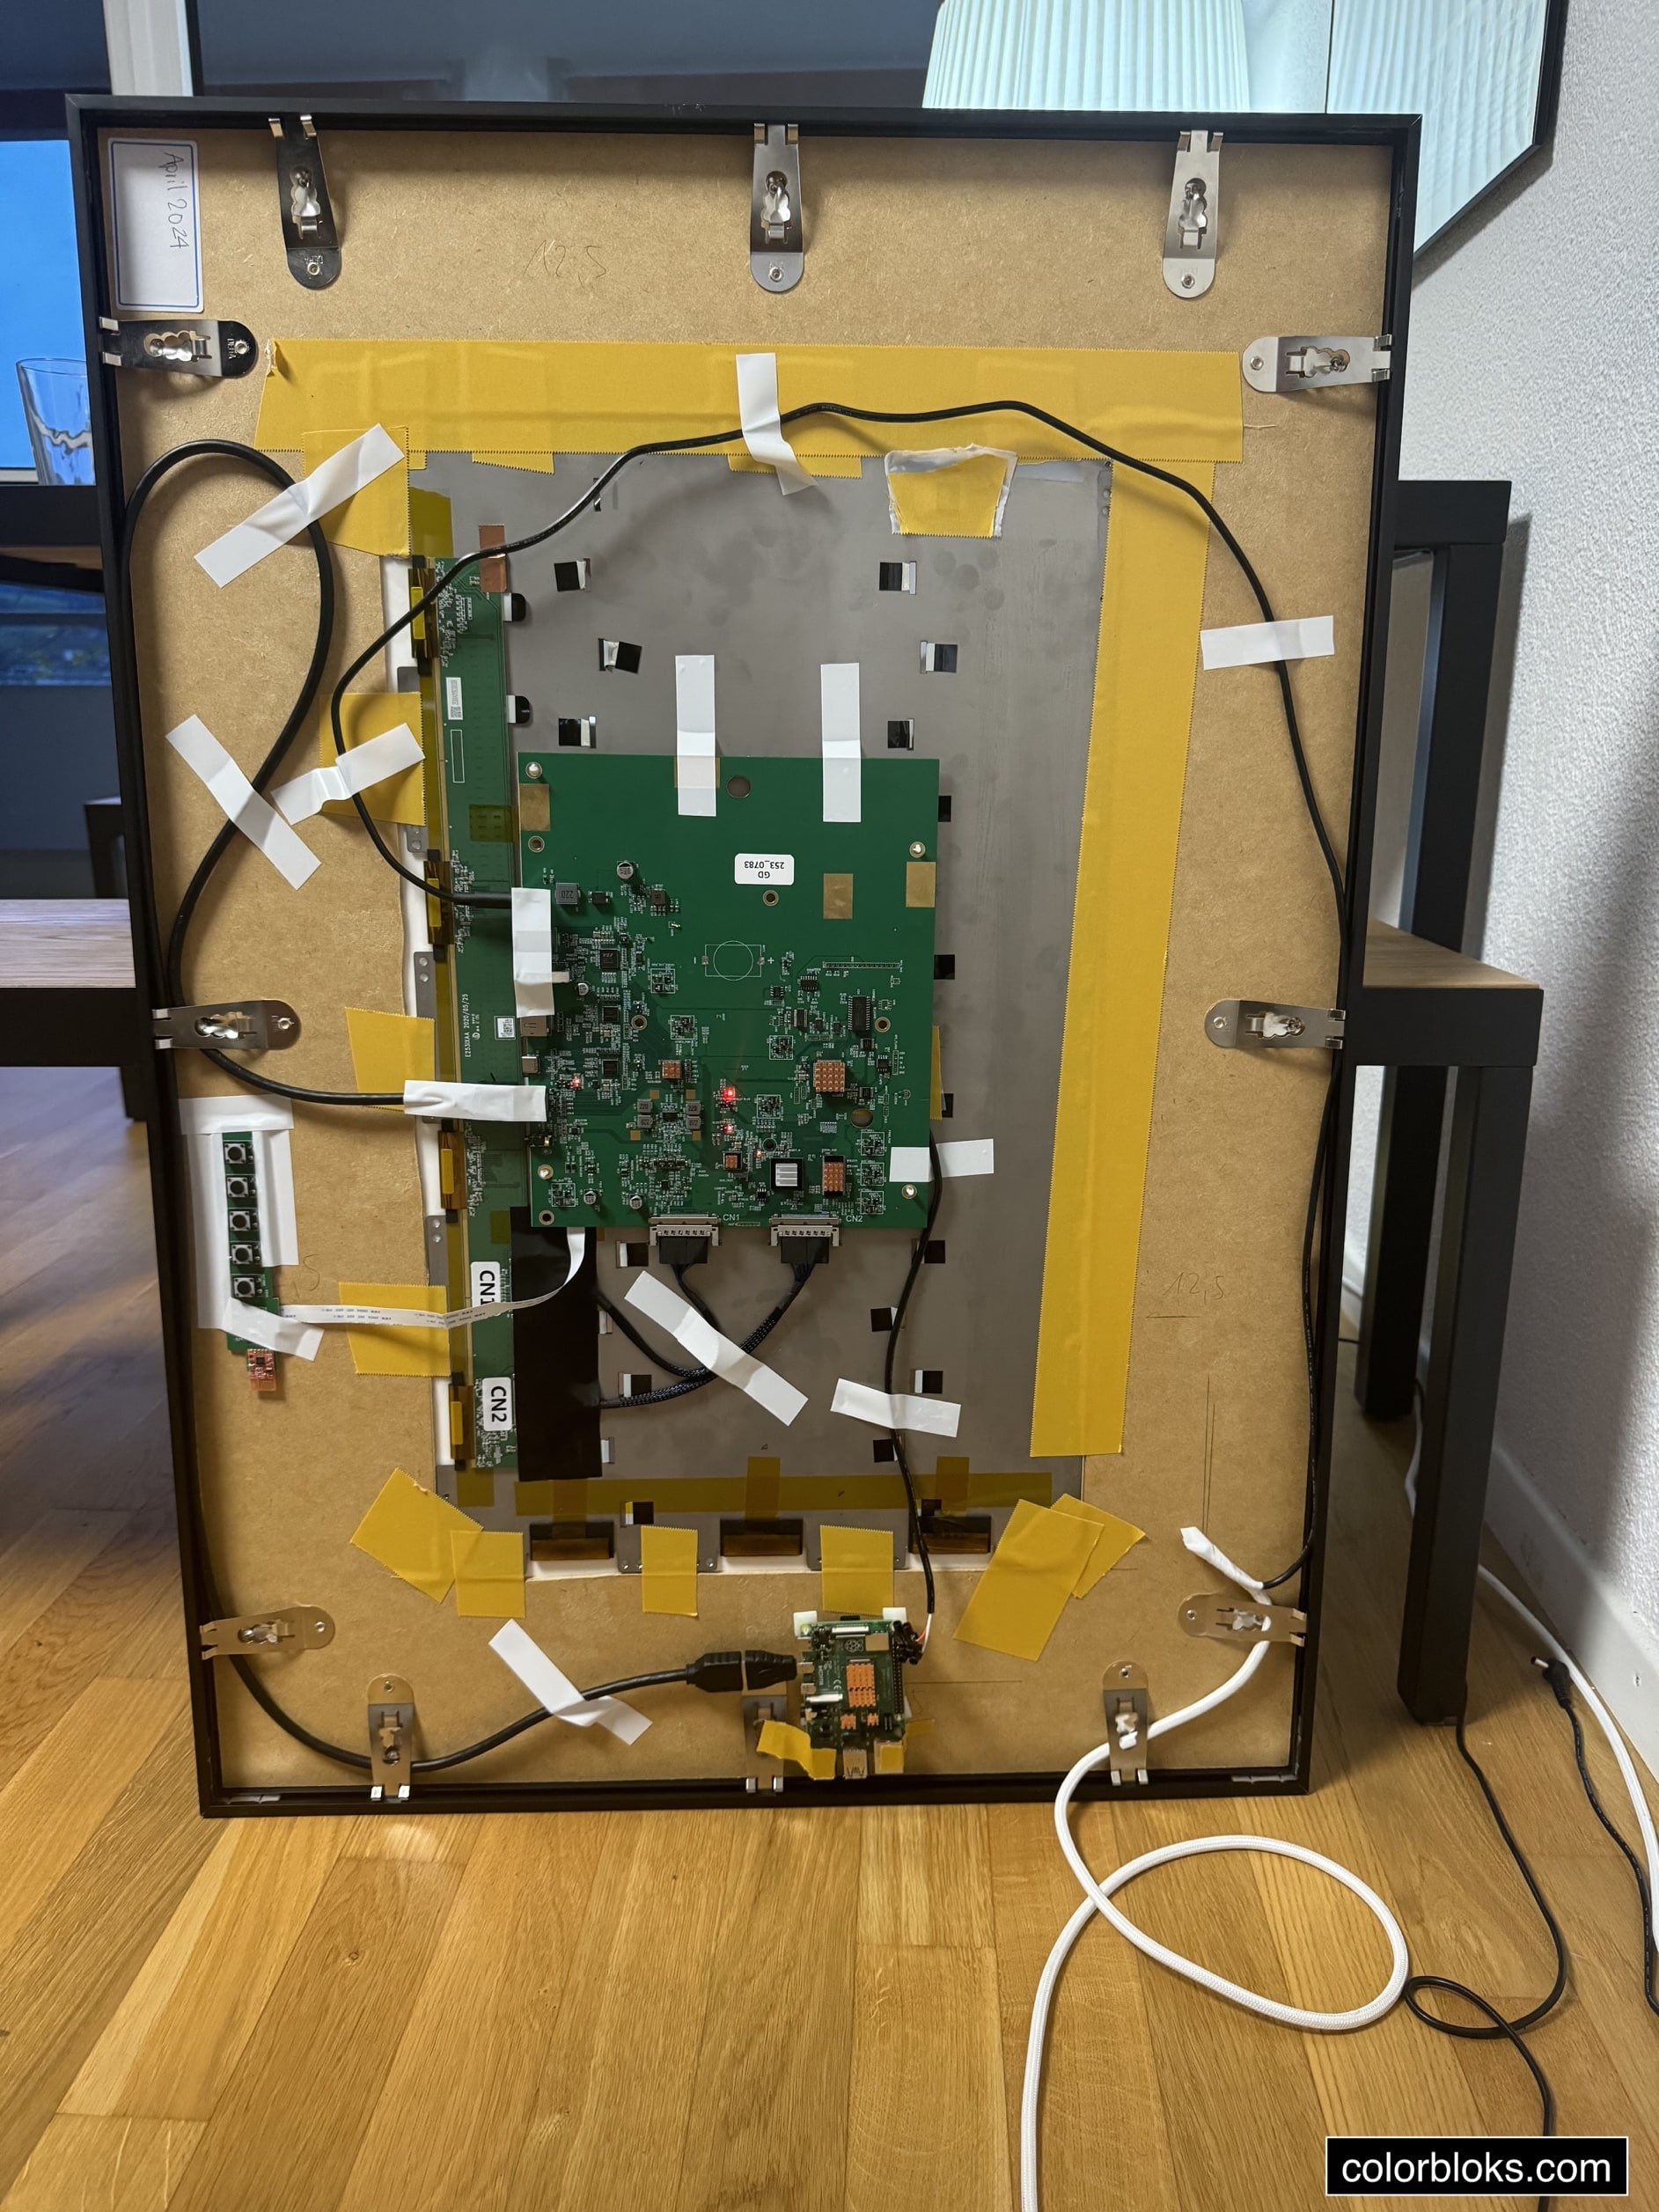
I purchased the aluminium frame at a local frame store. They do custom builds, so i was able to match the 25.3-inch monitor dimension, which is 16:9. What I basically did was just calculate the frame with a border of 15 cm, for the passepartout. The final size of the frame was about 89x49.5cm. As you can see in the image, i cut a hole into the backside of the frame. After adding the passepartout you can arrange the monitor from the backside. I just used duck tape to mount the display to the backside. Yes, it's ugly but it does the trick.

That's it! If you have any questions drop me a message:
hello@colorbloks.com or X